
Crafting Challenge....ACCEPTED!
9:22 AM
Yes. I just said we're Driving. From Louisiana to Alaska. No, I'm not at all certain I'm sane. Even from there we had two options. We could take the ferry on the Marine Highway from Bellingham Washington into Alaska which I'm certain would be a beautiful three days of scenery. On a ship. With small children, a dog and a cat. *gulp* Luckily (for me..haha) the ferry is booked up until a month after his report date so I don't have to talk hubby out of that idea. So driving through Canadia it is (yes I know, it's Canada. It's an joke we often make around my home, eh). This is going to give us some time to see some amazing things. I'm personally excited to get to go to Edmonton. Specifically....The Mall in Edmonton!
 This Mall isn't like normal Malls. This Mall in addition to the typical theaters, food courts and stores, has an amusement park, an aquarium, a water park, a glow in the dark put put course, an ice skating rink, an indoor lake with bumper boats and an exact replica of Christopher Columbus' flagship, the Santa Maria. We're so excited we're planning on stopping there for two or three days. It's a great way to break up the monotony of such a long drive and allow the kids some summer fun and a chance to stretch their legs. They're all old enough now to enjoy parks like this whereas trips in the past, such as Disneyland, the littles were too little to appreciate it. And at Disneyland they wound up with strep throat. Poor kiddos.
 This still leaves the problem of what to do to entertain the littles during the rest of this epic journey. While there are stops that will be fantastic (like Grandma and Grandpa's house in Texas, although that's not a stop since they're spending the last week in Texas while Daddy and I clean the house and have everything packed up and we're picking them up on the way out), and a visit with very dear friends for the fourth of July at Fort Carson, there will be long stretches (I'm looking at you Wyoming) where there is nothing but scenery. No matter how pretty....scenery will eventually get boring when you're a kid.
We've already got some things planned like DVD players ( a must!) and frequent rest stops. But I've got some surprises I'm working on for them as well.
Road Trip Kits!
Each child will get a three ring binder with a map of our route so that they can trace it, coloring pages, sticker books, and blank paper so they can drive. I'm also throwing in some travel games and things of that nature for them.
Each child will get a three ring binder with a map of our route so that they can trace it, coloring pages, sticker books, and blank paper so they can drive. I'm also throwing in some travel games and things of that nature for them.
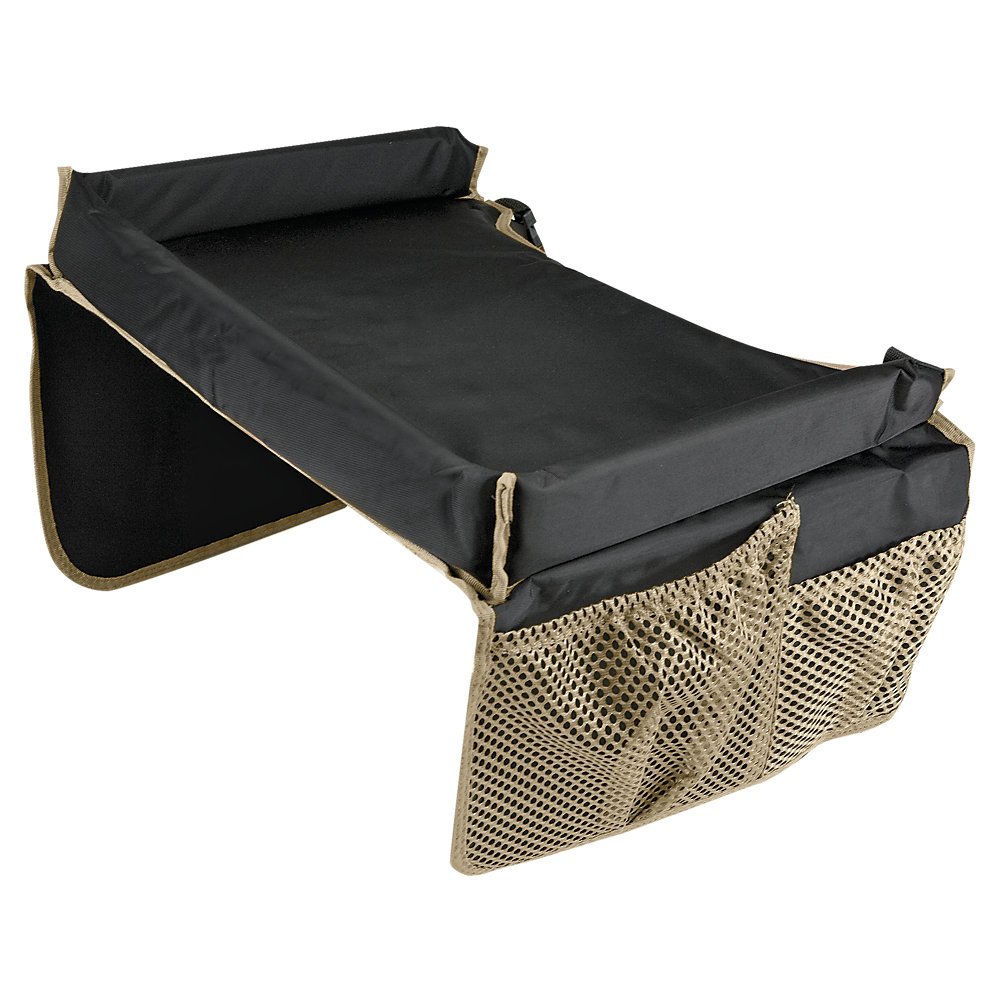
Travel Trays.
This is where the challenge comes in! These are adorable, and SUCH a great idea. What's the problem? They're 20 bucks a pop. If you've got one kid, that's a bargain. If you've got as many as I do? That's expensive! Hubby challenged me this morning to make them myself!
So I was thinking about it. I had already thought about how awesome cookie sheets are. They're cheap (a dollar) and magnetic and they have the raised sides that keep crayons and such from falling off of them. Hubby likes this model because of the pouches on the side and that it would be softer on their laps. This is where my idea is coming in.
What I think I'm going to need:
4 Cookie Sheets
White Contact Paper
4 old pillowcases OR fabric
Ribbon and velcro to make the strap that goes around to keep it from sliding off
Material for Pockets
Batting and or stuffing. Or maybe beans. Beans mesh well and they're cheap
Hot glue
Spray Paint and Metal Primer
and Magnetic Paper
The intent:
Step 1. Prime and Paint the cookie sheets in colors for kids.
Step 2. After paint is fully dry, cut and apply white contact paper to inside of cookie sheet to create whiteboard area.
Step 3. Make a Boxy pillow out of fabric. Make pockets and sew to sides of Boxy pillow. Fill with beans or filling or batting.
Step 4. Sew Velcro to Ribbon and sew to pillow in right lengths. Probably before filling actually. Could be messy.
Step 5: Glue Boxy Pillow to underside of Cookie Sheet
Step 6: Use Magnetic paper to make play sheets for kids. I intend to glue I's Paperdolls for instance to the magnetic paper and cut them out. So she'll have magnetic paper dolls for her trip. I'll probably glue magnets to the bottom of some travel games and some cheap dollar store cards for the kids as well. The possibilities are endless.
End result? Cheap cost effective whiteboard lapdesks with raised sides and pockets for the kids on this road trip. I am ABSOLUTELY accepting this challenge!
Anyone care to accept the challenge with me? Take pictures and share!! Let me know how it goes.


0 comments:
Post a Comment